Since we are building a small home, we started in the
logical place – the foundation.
Thankfully we have a cement slab in the back yard so we’re locating the
house on that. I say thankfully, because
that means we can build a simple foundation of just 2 x 6s and apply primer to protect the wood from water.
 |
| Foundation of 2" x 6" boards |
There are some products specifically made to protect exterior wood
from water but we’re trying to do this project on the cheap and opted for the
protection of paint instead. Hopefully
we won’t regret this decision in 20 years.
Performing all the cuts, pocket holes, and painting for the
foundation took us a whole Saturday so that ended Phase 2 of the Dog House
Build. But that little phase makes for a short, and
boring blog so let’s time travel to the following Saturday where Phase 3 began,
the exterior walls go up!
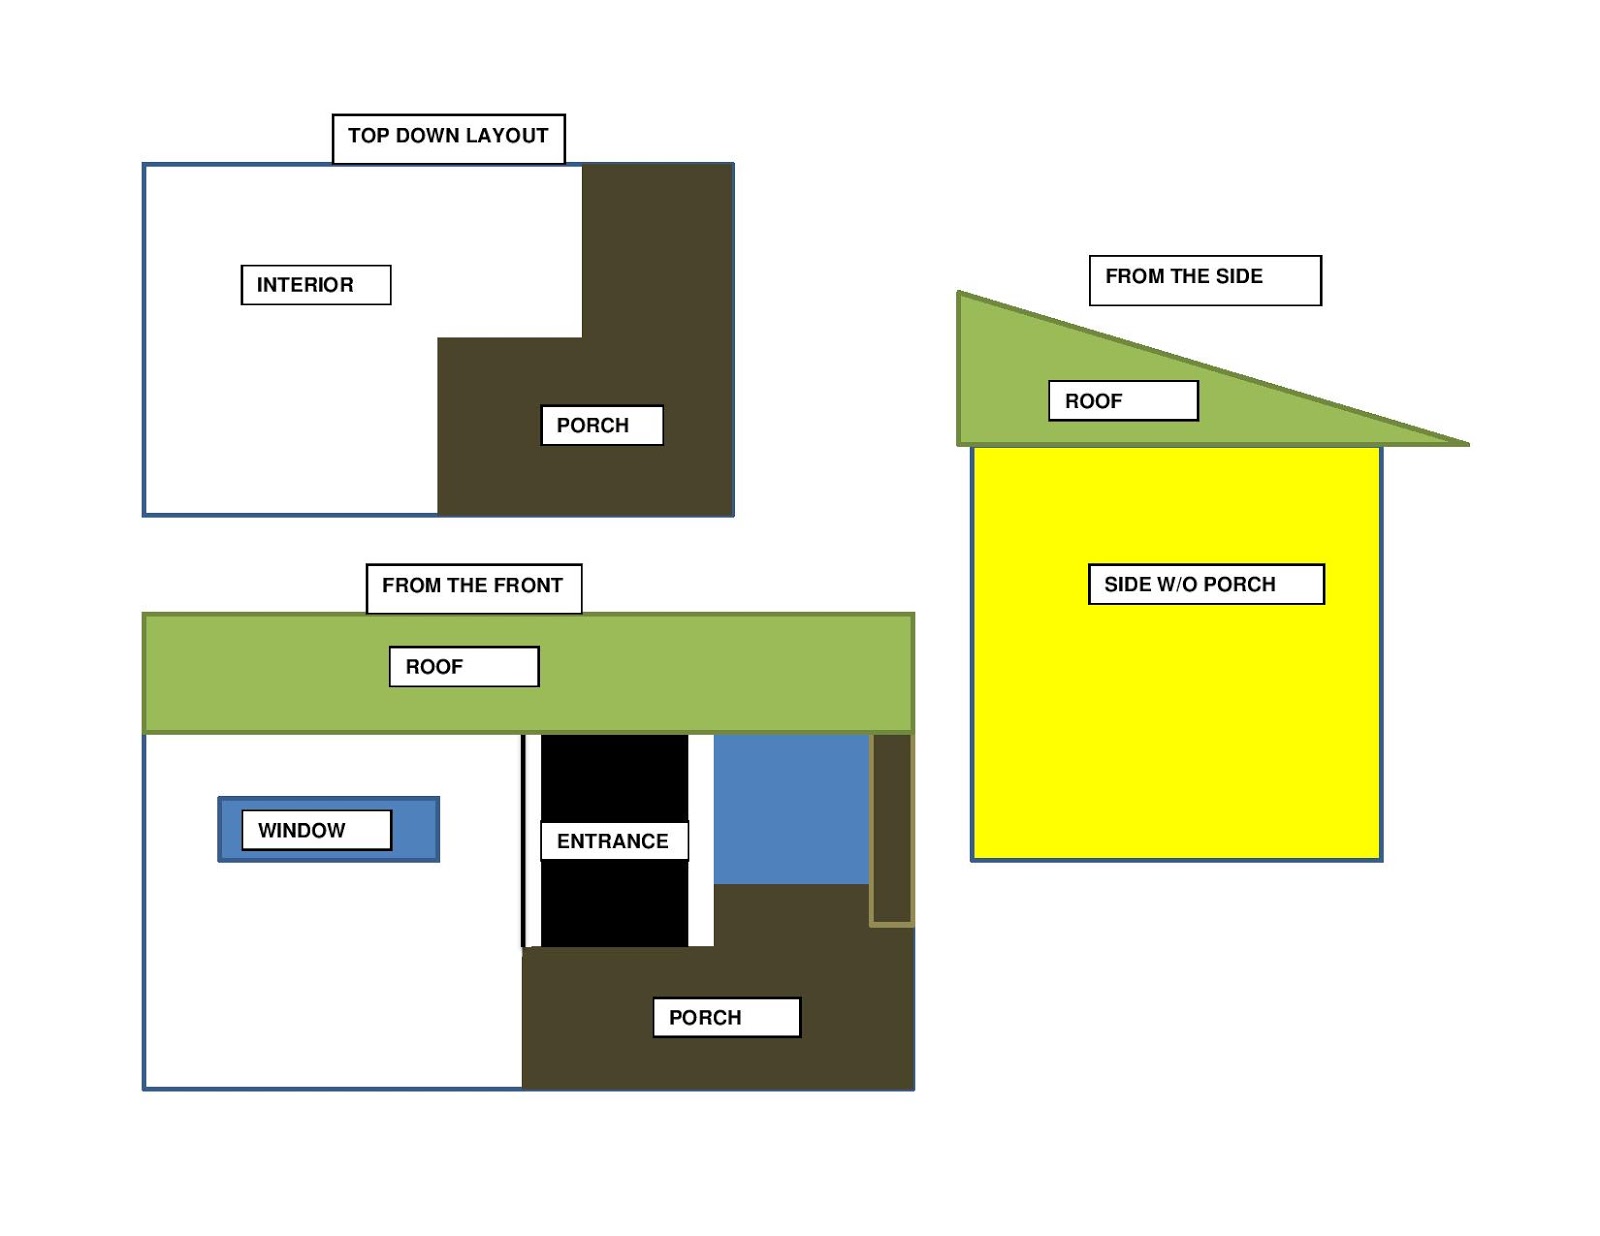
Here is where we began to frequently consult our building
plans and we even performed some basic geometry to calculate the angle of the
sloped roof. (See younger selves! Geometry WILL be useful in real life!) We opted to use 3/4” plywood for
the floor and walls since that thickness will not easily warp or bow.
Plywood comes in
all levels of “niceness” in appearance that correlates with the amount of money each piece costs ($17 - >$50 each).
We chose to save a bit of moolah and use the cheap (big chunks of wood
glued together) plywood for the unseen floor and back wall. Mr. DIY desired a smoother, polished look for
the parts of the dog house that are seen, so we purchased mid-level plywood w/
a veneer finish for the front and side exterior walls.
Full sheets of plywood are a bear to grapple across our
table saw, so we opted to make most of these cuts on our driveway with the
circular saw. I’m sorry I don’t have any
pictures of this part but it was boring anyway.
 |
| Exterior walls are up! |
After making all the cuts, we dry assembled the walls (fitting
them together without glue or nails) to make sure our drawn plans actually created the dog house we had envisioned. Good news
is they did! After confirming it looked like we wanted, we used our handy-dandy pneumatic nailer to put
all the pieces up.
You can see here the assembled and primered exterior of the
dog house. What you may or may not notice are the 2 x 2s that we included as
supportive elements to the integrity of the house. The 2 x 2 across the middle of the roof is in
place for roof support, but we realized later in the project that we really should have saved that piece for much later.
 |
| 2 types of plywood |
Next up, in goes the insulation and on goes the deck!
Thanks for stopping by our neck of the DIY neighborhood. And as our favorite neighbor Mr. Rogers used to say, "You always make each day a special day for me, by just being you. There's only 1 person in this WHOLE world like you; that's you yourself, and people can like you exactly the way you are. I'll be back next time. Bye-bye!"
Bye-bye neighbor!